


How to Photograph Antique Furniture for Appraisal
Last Updated: November 7, 2026
Quick Summary
To learn how to photograph antique furniture for appraisal, shoot an overall view of the whole piece plus close-up detail shots of carving, veneer, hardware, and wear. Use indirect natural light, turn off the flash, keep the camera at mid-height, and include a tape measure in at least one shot.
- Shoot front, side, back, top, and underside views, plus each drawer pulled out.
- The full shot checklist takes about fifteen minutes and saves weeks of back-and-forth.
- Set white balance to daylight, keep ISO low, and walk closer instead of zooming.
- Photograph every chip, crack, stain, and repair with one wide shot and one close-up.
- Record height, width, and depth in inches and note which parts you measured.
Table of Contents
- Photos Needed for Antique Furniture Appraisal
- How to Photograph Antique Furniture for Appraisal Online
- How to Identify Antique Furniture Marks Before You Shoot
- Documenting Condition, Wear, and Restoration
- Showing Scale and Dimensions in Your Photos
- What Free Online Antique Appraisal Can and Cannot Establish
- Submitting Your Photos to Old Europe Antique Home Furnishings
- Frequently Asked Questions
Photos Needed for Antique Furniture Appraisal
Learning how to photograph antique furniture for appraisal starts with knowing which shots an appraiser actually needs. Image quality matters a great deal in a photo appraisal, and omitted shots can limit what an appraiser can assess.
You need two kinds of images: the overall view and the detail shot. Together they let an appraiser judge style, age, materials, and condition without standing in the room.
The Overall View and the Detail Shot
The overall view shows the whole piece in one frame. Shoot it straight on, then repeat from the side and back. The detail shot zooms in on the parts that carry information: carving, veneer, hardware, and wear.
- Front view: the full face of the piece, square to the camera
- Side view: shows depth and profile
- Back view: reveals construction and any later repairs
- Top view: the surface, useful for desks and tables
- Underside: raw wood, joinery, and tool marks
A Furniture-Specific Shot Checklist
Generic photo guides miss half of what an appraiser needs. Use this checklist every time:
- Full front view, camera at mid-height
- Left and right side views
- Back view, including the rear panels
- Top surface, shot at an angle to catch finish
- Underside of the case or seat
- Each drawer, pulled out, plus the drawer bottom
- Close-up of every maker's mark, label, or stamp
- Close-up of hardware, hinges, and locks
- Close-up of damage, repairs, and restoration
- A shot with a tape measure in frame
That list takes about fifteen minutes to complete. It saves weeks of back-and-forth later.
How to Photograph Antique Furniture for Appraisal Online
Online appraisal demands sharper images than an in-person visit. When you photograph antique furniture for appraisal online, the appraiser cannot move around the piece, open a drawer, or feel the wood. Your photos have to do all of that work. The difference between a useful submission and a rejected one usually comes down to light, camera settings, and a few mechanical habits that keep images sharp and color-true.
Lighting, Camera Settings, and Phone Photography
Natural light is your best tool, but not any natural light. Move the piece near a window that gets indirect daylight, turn off overhead lights, and shoot during the middle of the day. Overhead bulbs can cast yellow tones that distort finish color and hide grain.
A modern phone camera handles this job well if you control it. Tap the screen to focus on the piece, not the background, and then drag the exposure slider down slightly until the brightest highlight on the wood stops clipping.
For color accuracy, avoid the phone's automatic scene modes and any built-in filter.
Watch out: shooting into a bright window puts the furniture in shadow. Put the window behind you instead, so light falls across the piece, and stand slightly off-axis so your own shadow does not fall on the front.
Background, Angles, and Avoiding Glare
A neutral background keeps the eye on the furniture. A plain wall, a white or gray sheet, or a cleared floor works fine. Move clutter, rugs, and other furniture out of the frame, and remove personal items such as mail, keys, or family photos from the background before you shoot.
Shoot straight on for the front view, then step to each side. For polished surfaces and mirrors, shift your angle slightly until the glare moves off the wood; a polarizing filter helps if your phone accepts one, and a clip-on polarizer is inexpensive.
Keep the camera at mid-height for the front view so the piece is not distorted by looking down or up. For tall case pieces, back up and use the main (wide) lens rather than the ultra-wide, which bows straight lines at the edges.
File Format, Resolution, and Labeling
Send the highest resolution your phone produces, and keep the originals. Most appraisers accept JPEG and HEIC; if you are unsure, export to JPEG at the largest size. Do not send screenshots or images compressed by a messaging app, because compression removes the fine detail in maker's marks and joinery. Label each file clearly (for example, "sideboard-front.jpg," "sideboard-left-drawer-joint.jpg") so the appraiser can match shots to notes. Before sending, review the background of each image and crop or reshoot if personal information, addresses, or identifying documents are visible, and check your phone's settings to strip location metadata from shared images if you prefer not to share it.
How to Identify Antique Furniture Marks Before You Shoot
Knowing how to identify antique furniture marks before you start shooting saves an appraiser a lot of guesswork. Hunt for the marks first, then photograph them clearly. Identification hinges on these small clues.
Signatures, Labels, Stamps, and Maker's Marks
Look on the back, the underside, and inside drawers. Makers stamped or labeled pieces in consistent spots, and those marks can anchor a date and origin. For a deeper walkthrough of style-specific marks, see our guide on 6 steps to identify Italian Baroque furniture.
Photograph each mark square on, filling the frame. Add a second shot with a ruler beside it for scale.
Hardware, Joinery, and Construction Clues
Original hardware, hand-cut dovetails, and old tool marks all support age and authenticity. Pull one drawer and photograph the joint. If hardware looks replaced, shoot it anyway; appraisers read replacement as a clue, not a flaw. Our guide to replacing antique European cabinet hardware explains what original mounts should look like.
Documenting Condition, Wear, and Restoration
Honest condition photos protect you and help the appraiser. Shoot every chip, crack, stain, and repair, even the ones you would rather hide. A photo appraisal is only as good as its worst-documented flaw. The goal is not to make the piece look better or worse than it is; it is to give the appraiser enough visual evidence to judge condition the way an in-person examiner would.
A Condition Shot List
Work through the piece systematically so nothing is missed:
- Every chip, crack, dent, and scratch, shot close enough to show depth
- Water rings, stains, and finish loss on the top surface
- Veneer lifting, missing veneer, and patches
- Joint separation, loose legs, and wobble (shoot the gap, not just the joint)
- Repairs: new screws, glue lines, replaced feet, spliced wood
- Refinishing evidence: overspray on hardware, sanding scratches across grain, color that is too uniform
- Missing parts: a replaced pull, a missing escutcheon, a later mirror
- Upholstery wear, tears, and replaced fabric on seats
For each flaw, take one wide shot that shows where on the piece the flaw sits and one close-up that shows what it is. An appraiser who sees only the close-up cannot tell whether a crack is on the top or the back, and that changes the valuation.
Wear Versus Damage Versus Restoration
These are three different things, and appraisers read them differently. Wear is expected patina: rubbed arms, darkened handholds, softened edges. Damage is loss or breakage: a chunk of veneer gone, a broken leg, a burn. Restoration is intentional intervention: refinished surface, replaced hardware, new glue blocks.
Restoration changes value, so show it plainly. If a piece was refinished or repaired, photograph the area and say so in your notes. Our article on restoring antique furniture without losing value covers how treatment choices affect worth, and the difference between restoration and preservation is worth understanding before you submit.
Watch out: hiding damage to get a higher valuation backfires. Appraisers spot mismatched finish and new screws quickly, and a caught omission undermines the whole assessment. A documented flaw is a known quantity; an undisclosed one reads as a credibility problem.
Showing Scale and Dimensions in Your Photos
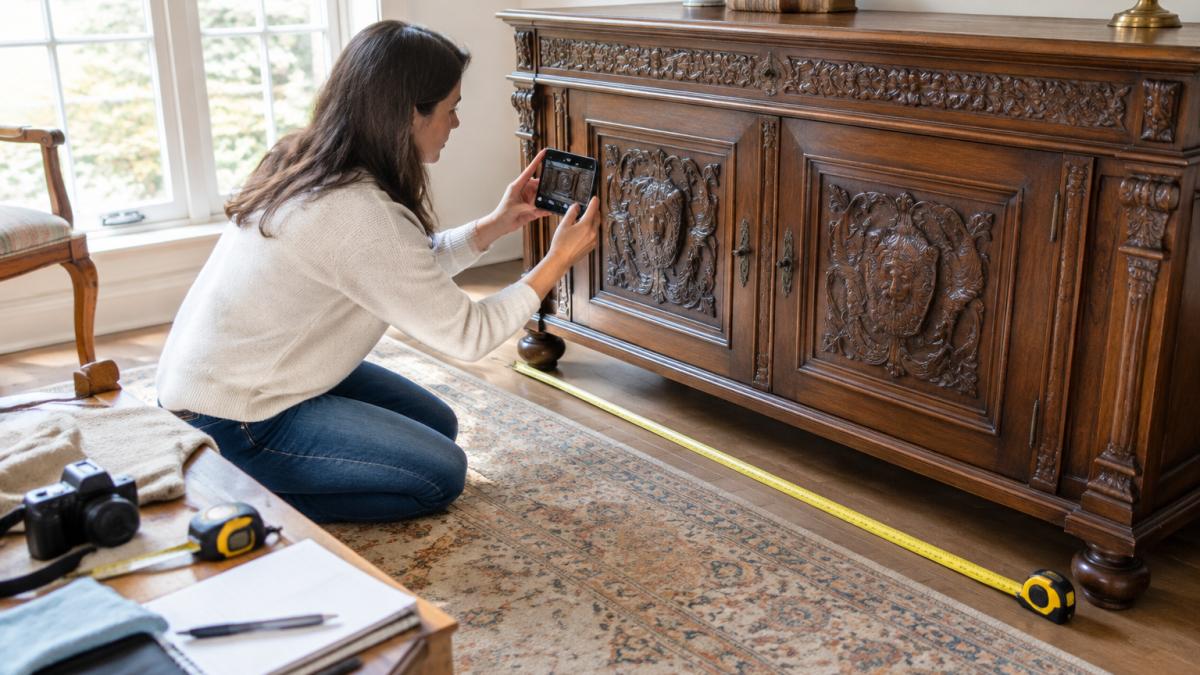
Photos without scale mislead. A cabinet can look tiny or monumental depending on the lens. Place a tape measure or ruler in at least one shot of each piece, and write the dimensions in your notes too.
Record height, width, and depth in inches, and note which parts you measured. For a piece like our French Renaissance Revival carved walnut sideboard, the hutch height and case width tell an appraiser more than any single number.

What Free Online Antique Appraisal Can and Cannot Establish
A free online antique appraisal can give you a starting point, not a final number. Photos can help confirm style, materials, and visible condition.
What photos cannot do is certify authenticity, detect hidden repairs, or replace a hands-on exam. An appraiser cannot smell old shellac or feel the weight of a drawer through a screen. Treat a preliminary opinion as guidance, and commission a full written appraisal for insurance, probate valuation, or a major purchase.
Submitting Your Photos to Old Europe Antique Home Furnishings
Contact us to discuss your photos. Gather your overall views, detail shots, mark close-ups, and measurements, then add any history you know about the piece. Provenance notes help, even short ones.
Label each file clearly, keep the originals, and send the highest resolution your phone produces. Review our luxury antique home decor online shop guide for context on how we source and describe pieces. Our showroom is available for viewing by appointment.
Photographing a piece properly takes an afternoon; skipping it can cost you an accurate valuation. Old Europe Antique Home Furnishings curates authentic European antiques dating back to the 16th century, and our team can help you document and understand what you own. We offer a curated selection of historical furnishings, expertly sourced pieces, and showroom viewings by appointment.
Frequently Asked Questions
What photos does an antique furniture appraiser need?
An appraiser needs a full overall view from the front, both sides, the back, and the top, plus close-ups of any maker's mark, signature, label, or stamp. Photograph the underside, the hardware, the joinery, and every area of wear, damage, or repair. Include one shot with a tape measure in frame so scale is clear. Ten to twenty well-lit photos covering the whole piece and its construction details give an appraiser far more to work with than a single wide shot.
Can an appraiser value antique furniture from photos alone?
Photos can support a photo appraisal that identifies style, period, materials, and visible condition, which is often enough for insurance scheduling or a preliminary valuation. What photos cannot do is confirm authenticity, detect hidden repairs, or assess structural soundness the way an in-person expert assessment can. Treat an online valuation as a starting point, and plan on a hands-on review for high-value pieces or anything you intend to sell.
Should I clean or repair antique furniture before photographing it for appraisal?
Do not repair, refinish, or aggressively clean a piece before photographing it. Original finish, patina, and wear are part of what an appraiser evaluates, and stripping or polishing can reduce value. Dust lightly with a soft cloth and leave chips, cracks, and worn spots visible. If a piece is dirty, photograph it as-is first, then clean gently afterward. Document any existing damage in close-up so the appraiser sees the true condition.
How do I get a free online antique appraisal?
Many dealers and appraisal services accept photo submissions for a preliminary opinion. Send clear, well-lit photos of the entire piece plus close-ups of marks, hardware, and condition, along with dimensions and any history you know. A free online antique appraisal gives you a general sense of style and value range, while a formal written appraisal from a qualified appraiser is a paid service used for insurance, probate, or resale.
