


Replacing Antique European Cabinet Hardware: A Practical Guide
Quick Summary
To replace antique European cabinet hardware, first identify the original pieces by type, material, finish, and mounting holes, then measure center-to-center hole spacing before buying. Choose period-correct authentic parts or quality reproductions, and install them without enlarging or redrilling the cabinet if you can.
- Measure center-to-center distance between mounting holes, not edge to edge.
- Run a magnet test: steel reacts to a magnet, while solid brass does not.
- Confirm center-to-center spacing in writing before paying for any listing.
- Use a back plate or rosette to cover old holes instead of redrilling the door.
- Do not polish away natural patina, since cleaning can strip value.
Table of Contents
- Why Antique European Cabinet Hardware Is Worth Replacing Carefully
- Identifying Your Original Hardware Step by Step
- Measuring for an Antique European Cabinet Hardware Replacement Kit
- Authentic Antique Versus Reproduction Hardware: Trade-Offs and Quality Checks
- Sourcing Antique European Cabinet Hardware Replacement Parts
- Matching Finishes and Installing Replacement Hardware Without Damage
- Choosing Your Next Piece: Sourcing Antique Furniture Hardware Replacement Parts From Old Europe
- Frequently Asked Questions
Why Antique European Cabinet Hardware Is Worth Replacing Carefully
Last Updated: November 6, 2026
Antique European cabinet hardware is often the first thing to fail, and the last thing to replace well.
The reason is simple. Original hardware is part of the object's history. Collectors often judge a cabinet by its proportions, its finish, and whether the metalwork matches its period.
Most owners face three situations:
- Broken or missing parts: a cracked knob, a lost escutcheon, or a snapped hinge
- Worn finishes: brass that has lost its color or patina that has rubbed away
- Functional failure: locks that stick or drawers that no longer slide
Each situation calls for a different approach. The rest of this guide walks through identification, measurement, sourcing, and installation, so you can choose the right path for your piece.
Identifying Your Original Hardware Step by Step
Before you buy anything, identify what you already have. Start by photographing each piece from the front and side, then note its location, shape, and material. Look at the back of pulls and the inside of drawers for maker's marks or casting seams, which can point to the era and region.
Work through these checks in order:
- Note the hardware type: pull, knob, hinge, lock, or escutcheon
- Check the material with a magnet, since steel reacts and solid brass does not
- Examine the finish for lacquer, gilding, or natural patina
- Record how many mounting holes the piece uses and their spacing
Recognizing Period Styles and Construction Clues
European period styles leave clear marks on hardware. Rococo pieces often show asymmetrical scrolls, while Neoclassical work favors symmetry, rosettes, and fluting. Louis XVI-style mounts tend toward restrained ormolu, and later Renaissance Revival pieces use heavier, more ornate castings.
Construction clues help too. Hand-filed edges, irregular casting, and screws with slotted heads usually point to earlier work. Machine-cut threads and uniform castings often indicate a later date.
Reading Original Finishes: Brass, Bronze, and Aged Patina
Original finishes tell you a lot. Solid brass that has aged naturally develops a soft, warm patina rather than an even shine.
Do not polish away patina you do not need to remove. Cleaning can strip value. When in doubt, test a small area first.
The table below summarises the four checks to run on original hardware before buying any replacement.
| Check | What to look for | Why it matters |
|---|---|---|
| Hardware type | Pull, knob, hinge, lock or escutcheon | Sets the replacement category |
| Material | Magnet test: steel reacts, solid brass does not | Confirms metal before buying |
| Finish | Lacquer, gilding or natural patina | Guides cleaning and matching |
| Mounting | Number of holes and their spacing | Prevents wrong-size orders |
Measuring for an Antique European Cabinet Hardware Replacement Kit
Accurate measurements prevent wasted orders. The most important measurement is the center-to-center distance between mounting holes on pulls and handles. Measure from the center of one screw hole to the center of the other, not from edge to edge.
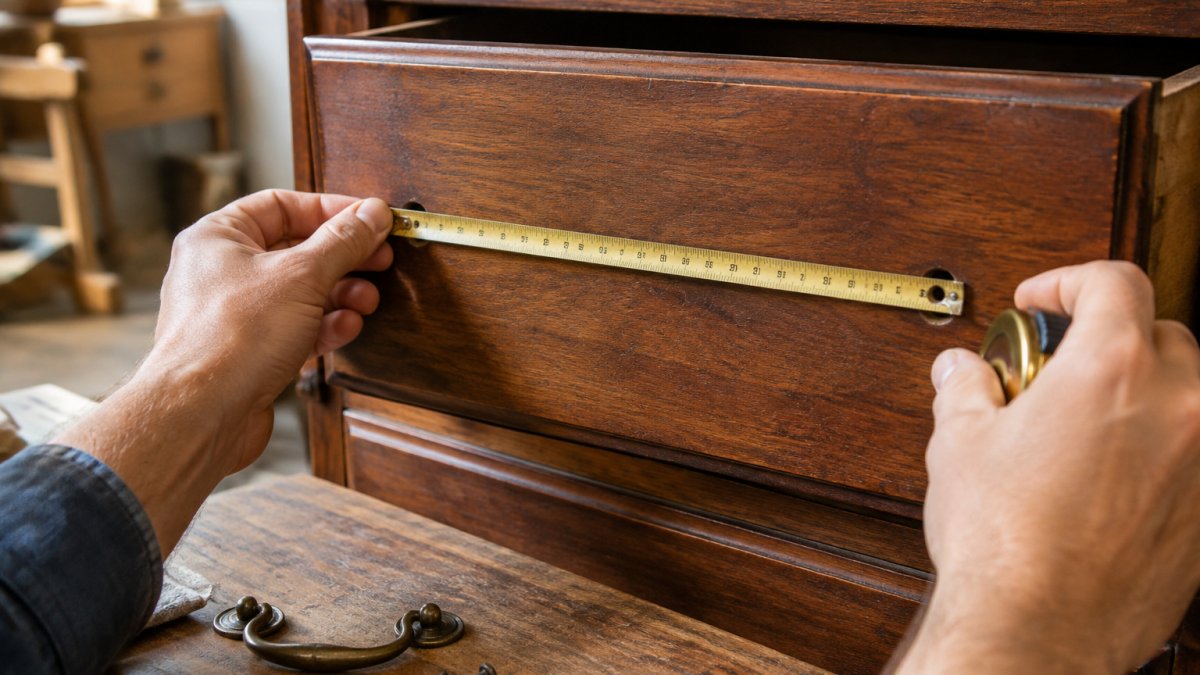
Use this checklist when you measure:
- Center-to-center spacing for each pull (in inches)
- Diameter or length of knobs and back plates
- Thickness of the door or drawer front
Bring the original screws to a hardware shop or measure them with calipers. European mounts sometimes use metric threads, so confirm before you buy.
Authentic Antique Versus Reproduction Hardware: Trade-Offs and Quality Checks
Authentic antique hardware carries provenance and character, but it can be fragile and expensive. Reproductions cost less, install more easily, and offer consistent sizing. Neither is wrong. The right choice depends on the piece's value and how it will be used.
Authentic antique hardware:
- Pros: period-correct, adds to value, unique wear and finish
- Cons: harder to source, may need repair, mounting holes may not match modern standards
Quality reproduction hardware:
- Pros: consistent sizing, easier installation, lower cost
- Cons: may look too new, lower resale value on rare pieces
Check quality by examining casting detail, weight, and screw fit. Solid castings feel heavy. Thin, hollow-feeling pieces often wear quickly. Watch for plating that flakes at the edges.
Sourcing Antique European Cabinet Hardware Replacement Parts
Sourcing is where most replacement projects stall. The part you need may be a single escutcheon from a matched set, and the odds of finding an exact match in a local shop are low. The practical approach is to search in widening circles, verify every listing against your measurements, and know when a near-match is good enough.
Search in the right order
Start with the smallest, most specific source and widen only when you strike out:
- The piece itself. Check the back of drawers, the inside of the cabinet, and any original packaging or tags for spare parts. Restorers sometimes tuck spare screws and keys inside a drawer or behind a back panel.
- Specialty antique hardware dealers. These sellers stock period pulls, escutcheons, hinges, and locks, often sorted by region and era. Ask whether they sell single pieces or only matched sets, since a single escutcheon is often harder to find than a full set of pulls.
- Restoration suppliers. These carry reproduction and salvage parts sized for older furniture, including metric-thread screws and adapters that general hardware stores rarely stock.
- Estate sales and auctions. Matched sets turn up here, but you usually have to buy the whole piece or lot. Inspect in person when you can, and photograph the hardware before the sale ends.
- Online marketplaces. Useful for rare singles, but the burden of verification is on you. Search by the hardware type plus the period style (for example, "Louis XVI escutcheon" or "Rococo drawer pull"), not by the furniture category.
Vet every listing before you buy
A listing photo can hide a lot. Ask the seller for these details in writing:
- Center-to-center hole spacing, measured the same way you measured your original
- Overall dimensions, including projection and back-plate size
- Material, confirmed with a magnet test or a clear statement that the piece is solid brass, bronze, or plated
A common pattern is that sellers list the decorative dimensions but omit hole spacing. If the seller cannot or will not provide center-to-center spacing, treat the listing as unverified.
Watch out: A pull that looks identical in a photo can be a half-inch off in hole spacing, which means drilling new holes in an antique door front. Confirm spacing before you pay, not after.
Judge whether a part is period-correct
Period-correct does not always mean original. A replacement part is a good match when it shares the original's construction logic, not just its silhouette:
- Casting method. Hand-filed edges and slight irregularities suggest earlier work; uniform, machine-finished castings suggest later reproduction.
- Screw heads. Slotted screws are period-appropriate for most 19th-century pieces; Phillips-head screws are a later development and a visible tell.
- Finish behavior. Natural patina develops unevenly and follows wear points. An evenly toned, uniform finish is usually applied, not aged.
Know when a near-match is acceptable
Exact matches are rare. A near-match works when the difference is invisible at normal viewing distance, when the hole spacing lines up, and when the finish can be blended. It does not work when the piece is a focal point, when the cabinet is a matched set, or when resale value depends on originality. In those cases, consider repairing the original part before substituting a near-match.
Matching Finishes and Installing Replacement Hardware Without Damage
Installation is where a good replacement goes wrong. Antique cabinet fronts are rarely flat, rarely square, and rarely drilled to modern standards. The goal is to make the new hardware fit the old piece without modifying the cabinet more than necessary, and to blend the finish so the replacement does not read as new.
Prepare the mounting area
Remove the old hardware and label each piece by location, since pulls and escutcheons are often sized for a specific door or drawer. Clean the mounting area with a soft cloth and a mild cleaner; avoid abrasive pads, which can scratch the finish around the holes. Inspect each hole for stripped threads, enlarged openings, and splits in the wood.
Adapt the hardware to the cabinet, not the reverse
Work through these fit problems in order before you drill anything new:
- Hole spacing does not match. If the new pull's center-to-center spacing is close but not exact, do not redrill the door. Use a back plate or rosette wide enough to cover the old holes, or choose a pull with slotted or adjustable mounting holes. Redrilling an antique door front is a permanent change and should be the last resort.
- Screws are too small for the holes. Fill the hole with a glued wood dowel, let it cure fully, then drill a fresh pilot hole sized to the new screw. Do not pack the hole with toothpicks or filler alone; those repairs fail under load.
- Screws are metric. European hardware often uses metric threads. Match the screw to the hardware, not to the old hole, and enlarge the hole slightly if needed rather than forcing a mismatched screw.
Watch out: Overtightening a screw into old, dry wood is the most common cause of splits around a mounting hole. Tighten until the hardware is snug, then stop; if the hardware still moves, address the hole rather than adding torque.
Blend the finish instead of matching it exactly
A new brass pull next to a century-old patina will look new no matter how close the color is. Aim for a blend:
- Aged brass and natural patina. Leave new solid brass unlacquered so it darkens over time, or apply a thin coat of wax to soften the shine. Avoid polishing the surrounding original hardware to match the new piece; you will strip patina you cannot restore.
- Gilt and ormolu. Gilding wears through to the base metal in a characteristic pattern. A reproduction with uniform gilding will read as new; a lightly toned or antiqued finish blends better.
- Mixed metals. Close tones can look intentional. Widely different tones, such as bright brass next to dark bronze, usually read as a mismatch.
Final check before you walk away
Open and close every door and drawer through a full cycle. Confirm that pulls clear adjacent surfaces, that locks engage without forcing, and that hinges carry the door without sagging. If a hinge replacement changed the door's alignment, adjust the hinge before adjusting the cabinet.
Choosing Your Next Piece: Sourcing Antique Furniture Hardware Replacement Parts From Old Europe
If you are also looking for your next cabinet, our collection is a good place to start. Our antique French furniture buying guidance can help you understand what to look for in period construction, and you can browse our New Inventory For Old Europe Antique Home Furnishings for current pieces and parts.
Our Antique Cabinet, En Corniere, Gilt Metal, French Style Mounted Marquetry is priced at $1,175.00 and features marquetry inlay and gilt metal mounts. It lacks glass and key. Our Two Cast Brass Metal Leaf-Form Wall Sconces are priced at $917.00.
For a broader view of period furniture, read our Authentic French Provincial Furniture for Sale: A Buyer's Guide. You can also explore Where to Sell Antique European Cabinets: A Practical Guide if you are considering moving a piece you no longer need.
Replacing antique European cabinet hardware takes care, but it rewards the effort. Measure carefully, match the period, and choose quality over speed.
Frequently Asked Questions
Where can I find replacement hardware for antique furniture?
Start with specialty antique hardware dealers and restoration suppliers, which often stock original-style pulls, knobs, escutcheons, and hinges in brass and aged finishes. Salvage yards and estate sales can also turn up matching pieces. Bring the original piece's measurements, especially center-to-center spacing and the mounting hole diameter, so you can confirm fit before buying. For a broader selection of period-appropriate options, Old Europe Antique Home Furnishings offers a curated selection of authentic European antiques, which you can browse online or by appointment at the Austin showroom.
What is the 1/3 rule for cabinet hardware?
The 1/3 rule is a placement guideline suggesting that a pull or knob be positioned about one-third of the way along the drawer or door width, measured from the nearest edge, so the hardware looks balanced. On tall cabinets and long drawers, it helps keep the hardware visually centered and easy to reach. Use it as a starting point rather than a strict requirement, since original antique hardware was often placed according to the cabinet maker's own proportions. Check the existing mounting holes on the piece first, because they often show the intended placement.
How do I identify antique European cabinet hardware?
Look at the construction, the mounting method, and the finish. Hand-cast pieces often show slight irregularities, soft edges, and screw holes that were drilled rather than machined. Original brass typically develops a warm patina over time, while later reproductions tend to have uniform, bright plating. Check the backplates and screw heads, since slotted screws and irregular threads suggest older production. Identification is rarely definitive from appearance alone, so compare several details together before concluding a piece is period-original.
Can modern hardware fit an antique cabinet?
Modern hardware can fit an antique cabinet, but the mounting hole spacing and screw length must match the wood thickness and existing holes. Many antique drawers are thinner than modern ones, so long screws can protrude through the front. Filling unused holes with dowels and redrilling is a common approach, though it can affect the piece's originality and value. For collectors, keeping original hardware or choosing period-style replacements usually preserves more of the piece's character.
