


How to Pick Natural Oils for Antique Furniture Restoration
Last Updated: October 30, 2026
Quick Summary
The best antique furniture oils are pure tung oil for daily-use pieces and lighter hardwoods, and linseed oil for dark, dry woods needing depth. Match the oil to the existing finish and condition, and always patch-test a hidden spot first. The rarer and older the piece, the gentler the treatment should be.
- Test a hidden spot with denatured alcohol to identify whether the finish is shellac, lacquer, varnish, or oil.
- Apply thin coats with a lint-free cloth, wait 15 to 30 minutes, then wipe off all excess.
- Raw linseed and pure tung oil can take several days to a week or more to cure.
- Spread oil-soaked rags flat to dry outdoors, away from buildings, or submerge them in water.
- Re-oil only when the wood looks dry, typically once or twice a year at most.
Table of Contents
- Why Antique Furniture Oils Need a Different Approach
- Linseed Oil on Antique Furniture: Strengths and Real Risks
- Tung Oil for Wood Furniture: The Durable, Water-Resistant Choice
- Danish, Teak, and Lemon Oil: What Each One Actually Does
- How to Restore Dry Antique Wood Without Causing Damage
- Side-by-Side Comparison: Matching the Oil to the Antique
- Antique Furniture Care and Maintenance After Oiling
- Choosing the Right Oil for Your Piece at Old Europe
- Frequently Asked Questions
Why Antique Furniture Oils Need a Different Approach
Antique furniture oils are conditioning treatments that feed dry wood and revive its grain, but they are not refinishing products, and treating them as such is how valuable pieces get ruined.
The reason is simple: old wood is not new wood. Centuries of oxidation, wax buildup, and previous treatments sit on the surface. A natural oil penetrates the grain and feeds it, which is exactly what dry antique wood needs. A refinisher strips that history away.
Cleaning, Conditioning, or Refinishing: Know Which You Need
Most people oil furniture when the real problem is dirt. Before you open a bottle, decide which of these three you actually need:
- Cleaning removes surface grime, old wax, and fingerprints. It is the least invasive step and always comes first.
- Conditioning feeds dry wood and restores sheen without changing the finish. This is where natural oils belong.
- Refinishing strips the existing finish and rebuilds it. It is a last resort for damaged pieces and can reduce an antique's value.
If a piece looks dull but the surface is intact, you need cleaning and conditioning. If the finish is flaking or cracked through to bare wood, oil is not the answer.
How to Identify the Existing Finish Before You Oil
Test before you treat. A finish compatibility check takes minutes and prevents costly mistakes. Rub a small hidden spot with a cloth dampened with denatured alcohol.
Unusual surfaces deserve extra caution. A Belgian faux tortoise finish wood end table shows what one of these decorative surfaces looks like in practice. A faux tortoise finish, for example, is a decorative treatment rather than bare wood, and oiling it can cloud the surface.
Linseed Oil on Antique Furniture: Strengths and Real Risks
Linseed oil on antique furniture is the traditional choice, and it earns that reputation. Raw linseed oil penetrates deeply and enhances natural grain, giving old wood a warm, mellow tone.
The catch is real. Linseed oil cures slowly, and rags soaked in it can self-heat and catch fire if left bunched up. Spread them flat to dry outdoors. Boiled linseed oil also darkens wood over time, which is fine on a dark walnut buffet but wrong for a pale piece.
Tung Oil for Wood Furniture: The Durable, Water-Resistant Choice
Tung oil for wood furniture offers better water resistance and a harder cured film than linseed. Pure tung oil penetrates the grain, seals porous surfaces, and builds a durable finish with a soft sheen. It also resists yellowing, which makes it a safer pick for lighter hardwoods.
Two things to know. Pure tung oil is slow to cure and needs thin coats with excess wiped off. Many products labeled "tung oil finish" are blends with little actual tung oil, so read the label.
Danish, Teak, and Lemon Oil: What Each One Actually Does
Danish oil is a blend of oil and varnish that penetrates and leaves a low-sheen protective film, which suits mid-century furniture well. Teak oil is formulated for dense hardwoods and helps teak and similar species hold their color. Lemon oil is a cleaning and conditioning product, not a protective finish; it refreshes sheen and lifts grime but evaporates and offers little protection.
| Oil | Best For | Protection Level | Watch Out For |
|---|---|---|---|
| Linseed (raw or boiled) | Dry, dark woods needing depth | Moderate | Slow curing, darkens wood |
| Tung | Daily-use pieces, lighter hardwoods | High, water-resistant | Slow cure, watch for blends |
| Danish | Mid-century furniture | Moderate film | Contains varnish solvents |
| Teak | Dense hardwoods | Moderate | Not for delicate antiques |
| Lemon | Cleaning and quick refresh | Low | Not a finish |
How to Restore Dry Antique Wood Without Causing Damage
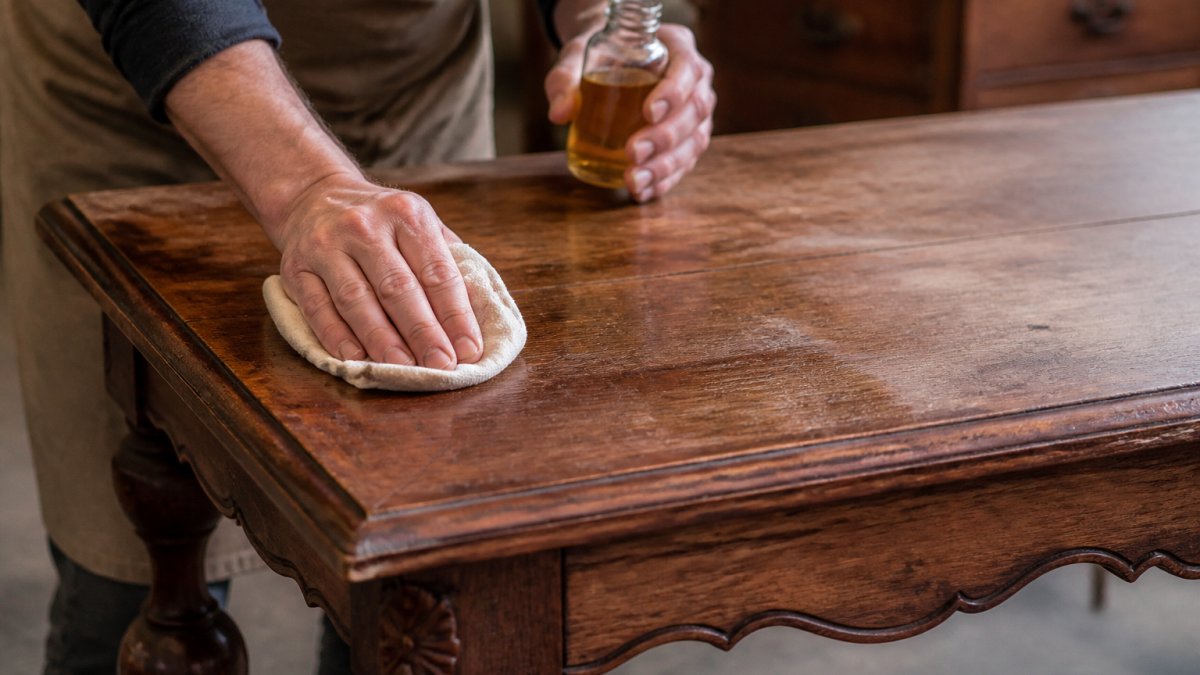
Restoring dry antique wood means feeding it slowly, not flooding it. Work in thin coats, let each one soak in, and wipe off the excess before it turns tacky. Thick puddles sit on the surface, attract dust, and cure unevenly.
Patch-Test Method
Before touching the visible surface, test a hidden spot: the inside of a leg, the back edge of a top, or under a drawer. Clean the spot and let it dry. Apply a small amount of oil with a lint-free cloth and wait 24 hours. Check for darkening, clouding, tackiness, or lifting of the surrounding finish. If any of those appear, stop and reassess. A patch test costs minutes; an irreversible color shift on a period piece costs value.
Surface Preparation
Clean first and let the wood dry completely. Oil applied over damp wood can trap moisture and cloud the finish. Remove loose dust and old wax with a soft cloth and a mild cleaner appropriate to the finish. Do not sand an antique to "open the grain" unless a conservator has approved it; sanding removes patina and original surface material.
Application Steps
- Clean the surface and let it dry completely.
- Test a hidden spot for finish compatibility and color change.
- Apply a thin coat with a lint-free cloth, working with the grain. A little goes a long way; a few ounces covers a dining table.
- Wait 15 to 30 minutes, then wipe off all excess before it turns tacky.
- Let the coat cure before judging the result. Raw linseed and pure tung oil can take several days to a week or more to cure, depending on humidity and coat thickness; Danish and teak oils cure faster because of their solvents and varnish content.
- Repeat only after the previous coat has cured, and only if the wood still looks dry.
A common mistake is oiling a piece that is still damp from cleaning. Trapped moisture under oil can cloud the finish. For pieces where you are weighing a gentle feed against a full refinish, our guide to restoration versus preservation walks through which path fits your antique.
Side-by-Side Comparison: Matching the Oil to the Antique
Most oil guides compare products by brand. For antiques, compare them by behavior: how deep they penetrate, whether they build a film, how much they shift color, how they hold up, and whether they are compatible with the finish already on the piece.
| Oil | Penetration | Film Formation | Sheen | Color Change | Durability | Maintenance | Antique Compatibility |
|---|---|---|---|---|---|---|---|
| Raw linseed | Deep | None (cures in the wood) | Matte to satin | Darkens and yellows over time | Low to moderate; slow cure | Re-oil when dry | Good on dark, dry, bare or oil-finished wood; risky on pale pieces and original patina |
| Boiled linseed | Deep | Very slight | Satin | Darkens faster than raw | Moderate | Re-oil annually or as needed | Contains metallic dryers; avoid on delicate or historically significant surfaces |
| Pure tung | Deep | Builds a soft film with repeated coats | Satin | Minimal yellowing | High; water-resistant | Re-coat every few years | Best all-around for daily-use antiques with bare or oil-finished wood |
| Danish oil | Moderate | Low-sheen oil-varnish film | Satin | Slight amber | Moderate | Re-oil when dull | Good for mid-century and utilitarian pieces; solvents can lift old finishes |
| Teak oil | Moderate | Light film | Satin | Slight | Moderate | Re-oil seasonally | Formulated for dense hardwoods; not for delicate antiques or veneers |
| Lemon oil | Surface only | None | Gloss from the carrier | None to slight | Low; evaporates | Frequent refresh | Cleaning and conditioning only; never a protective finish |
Read the table by risk, not by popularity. The least invasive option for a valuable piece with an intact finish is cleaning followed by a light conditioning with lemon oil or a thinned natural oil.
The rule we use: the rarer and older the piece, the gentler the treatment. Conservation-first thinking protects both the wood and the value.
Antique Furniture Care and Maintenance After Oiling
Antique furniture care and maintenance after oiling is mostly about restraint. Dust with a soft cloth, keep pieces out of direct sun and away from radiators, and re-oil only when the wood looks dry, typically once or twice a year at most.
Avoid silicone polishes and harsh solvents, which can damage finishes. Keep indoor humidity steady to prevent cracking. Our guide to investing in rare European antiques explains how careful maintenance safeguards that investment.
Choosing the Right Oil for Your Piece at Old Europe
Choosing the right oil starts with knowing the piece, including its finish, species, and condition before you treat anything. Every antique carries its own history, and the right oil respects it.
We offer a curated selection of authentic European antiques dating back to the 16th century, with a showroom available for viewing by appointment. Browse our featured antique of the day to see what is currently available, or shop our collection to find a piece worth caring for.
Frequently Asked Questions
What is the best natural oil for antique furniture?
There is no single best oil, because the right choice depends on the existing finish and the wood species. Tung oil suits pieces that need a durable, water-resistant finish and works well on oak and walnut. Linseed oil, especially boiled linseed oil, feeds dry wood but darkens it and dries slowly. Danish oil blends oil and varnish for a middle ground. For valuable antiques, test any antique furniture oil on a hidden spot first and favor the least invasive option.
Can you use olive oil on antique wood furniture?
Olive oil is a cooking oil, not a furniture finish. It stays liquid, attracts dust, and can turn rancid inside the wood grain, which leaves a sour smell and a sticky surface that is hard to remove. It also never cures into a protective film. Skip it and use a purpose-made antique furniture oil such as tung, linseed, or Danish oil instead, applied sparingly and wiped clean.
How often should antique furniture be oiled?
Most oiled antiques need conditioning once or twice a year, not monthly. A simple test: place a few drops of water on an inconspicuous area. If the wood absorbs them quickly and the surface looks dull and dry, it is time to oil. If the water beads, the finish is still protecting the wood. Over-oiling softens wood and attracts dust, so less is almost always better with antique furniture care and maintenance.
How can you tell whether antique furniture has an oil or wax finish?
Rub a small hidden area with a cloth dampened with mineral spirits. A wax finish feels slick and may lift slightly onto the cloth, while an oil finish looks dull and absorbs the solvent without a film. A hard, glossy surface that resists the solvent is likely lacquer, shellac, or varnish. Knowing which wood finish you have prevents incompatible layers, so test before applying any new oil.
The challenge with any antique is that every piece is different, and a treatment that suits one can harm another. Old Europe Antique Home Furnishings helps you identify what you have before you touch it, with a curated selection of European antiques, pieces dating back to the 16th century, and a showroom available for viewing by appointment. Get started with Old Europe Antique Home Furnishings and care for your antiques with confidence.
