


How to Verify 16th Century Antique Authenticity
Table of Contents
- Step 1: Conduct a Visual Inspection and Document What You See
- Step 2: Assess Materials and Recognize Age Clues
- Step 3: How to Spot Antique Reproductions and Alterations
- Step 4: Research Antique Provenance and Ownership History
- Step 5: How to Get an Antique Authenticated by a Specialist
- Step 6: Antique Appraisal and Authentication Methods
- Red Flags: Forgery and Provenance Concerns
- Frequently Asked Questions
Last Updated: October 8, 2026
Step 1: Conduct a Visual Inspection and Document What You See
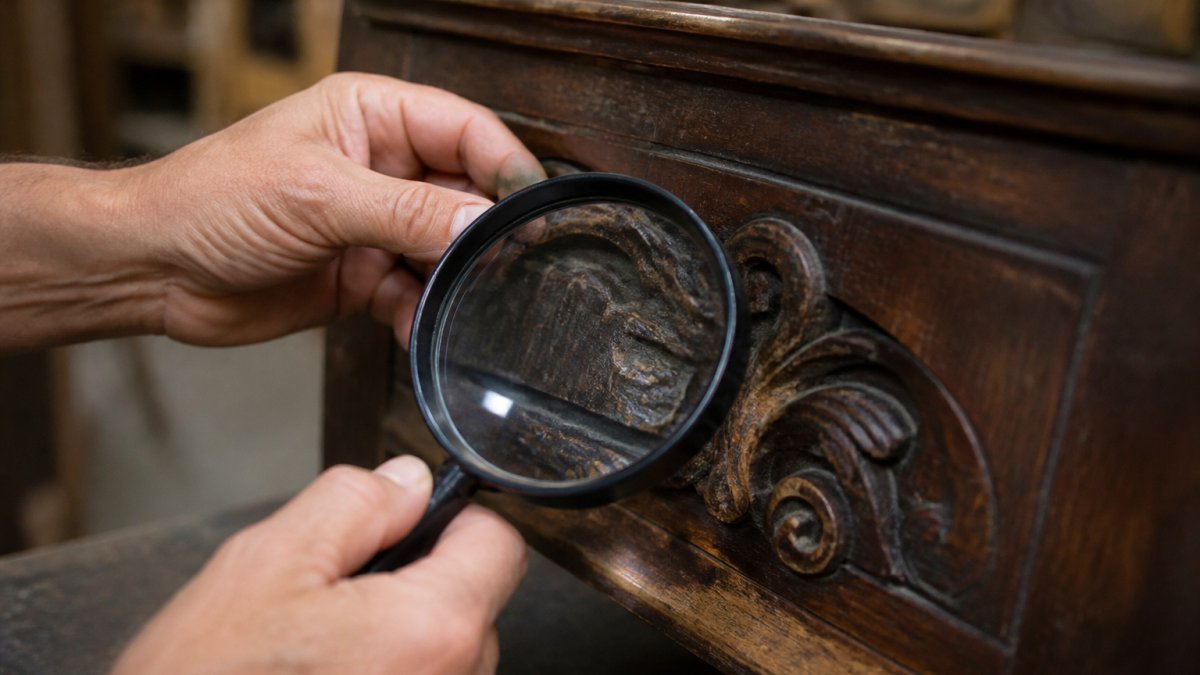
The first step to verify 16th century antique authenticity is to examine the object thoroughly and record everything you observe. A careful visual inspection reveals construction methods, materials, and details that distinguish genuine period pieces from reproductions.
Start by photographing the piece from multiple angles. Take clear shots of the front, back, sides, top, and bottom. Close-up photos of joints, seams, and any maker's marks are essential. Good lighting matters. Natural daylight or bright LED light shows details that dark rooms hide. These photos become your reference library for later research and expert consultation.
Photograph the piece from multiple angles
Multiple photographs serve as documentation for specialists and help you track details over time. Capture the entire object first, then zoom in on specific areas. Focus on joints, construction seams, and any visible signatures or labels. Include photos of wear patterns, damage, and repairs. These images become evidence of authenticity or red flags for alterations.
Examine construction methods and joints
How the piece is built tells you whether it's genuinely old. Examine where wood pieces connect. Hand-cut joints show irregular edges and tool marks. Machine-made joints are perfectly uniform and precise. 16th-century furniture uses hand-cut joinery because machines didn't exist yet.
Look at how wood is attached. Genuine antiques use wooden pegs, hand-forged nails, or hide glue. Modern reproductions often use screws, metal fasteners, or modern adhesives. Check underneath tables, inside drawers, and behind panels. Builders spent less care on hidden surfaces, so you see more authentic wear and original construction there.
Look for maker's marks, signatures, and labels
Many 16th-century craftspeople signed their work or left identifying marks. These signatures, stamps, or labels help establish provenance and verify authenticity.
Maker's marks vary widely. Some are carved initials. Others are stamps or brands burned into wood. Religious artifacts often carry guild marks or artist signatures. Document any marks with clear photographs.
Step 2: Assess Materials and Recognize Age Clues
Understanding what materials were available in the 16th century helps you spot reproductions. Genuine period pieces use materials consistent with their era. Wood types, finishes, and construction materials all provide authentication clues.
Evaluate wood type and aging patterns
Different woods were available in different regions during the 16th century. European oak, walnut, and fruitwoods were common. Tropical woods like mahogany didn't arrive in Europe until later centuries.
Examine the wood grain and color. Genuine aged wood develops a patina over centuries. The surface darkens unevenly. Wood shrinks as it ages, creating small cracks and checking patterns. These cracks follow the grain naturally.
Feel the wood surface. Genuine antique wood has a smooth, worn feel from centuries of handling. The finish may be uneven or partially worn away.
Check for patina and wear appropriate to the period
Patina is the accumulated surface layer that develops over centuries. It's not dirt. It's oxidation, dust, and handling marks that become part of the wood. Genuine patina is uneven.
Wear patterns tell a story. Handles show smooth wear. Feet show darker wood from floor contact. Edges are rounded from centuries of movement and handling.
Check for woodworm or insect damage. Genuine antiques from Europe often show small holes from woodworm activity. These holes are scattered randomly, not uniform.
Step 3: How to Spot Antique Reproductions and Alterations
Reproductions range from honest copies to deliberate fakes designed to deceive. Learning to spot them protects your collection and investment. Alterations to genuine antiques are also common and must be documented.
Identify machine-made versus hand-crafted elements
Machines leave distinctive marks. Machine-cut wood has perfectly straight edges and uniform thickness. Hand tools create slight variations and visible tool marks. Run your fingers along edges and joints. You'll feel the difference.
Machine nails are uniform in size and shape. Hand-forged nails are irregular. Each one is slightly different. Modern reproductions often use machine nails throughout, even when claiming to be hand-made.
Drill holes are perfectly round and uniform depth. Hand-drilled holes are slightly irregular. Saw marks from hand saws are curved and visible. Circular saw marks are perfectly straight.
Detect repairs, restoration, and modifications
Repairs and restorations are normal for 500-year-old objects. The question is whether they're documented and appropriate. Undisclosed alterations reduce value and authenticity claims.
Look for wood color changes. Patches of new wood stand out against aged wood. New finishes are glossier than original finishes. Mismatched wood types indicate replacements. A table leg replaced with modern oak is a modification worth noting.
Check for replaced hardware. Original handles, hinges, and locks are period-specific. Modern replacements are obvious under close inspection. Document what's original and what's been replaced. This honesty strengthens your authentication case rather than weakening it.
Step 4: Research Antique Provenance and Ownership History
Provenance is the documented history of ownership and location. Strong provenance supports authenticity claims. Weak or missing provenance raises questions.
Gather documentation and compare with auction records
Start by collecting any paperwork that came with the piece. Previous sale receipts, insurance documents, and family records all help establish provenance. Photograph or scan these documents.
Search online auction records. Major auction houses catalog sold items with detailed descriptions and photos. If your piece matches one that sold years ago, you've found valuable documentation. Note the auction house, date, and lot number.
Visit museum collections online. Many museums have searchable databases of similar pieces. Museum descriptions provide context about construction, materials, and period features. Use these as comparison points for your own research.
Verify historical context and period features
Research what objects like yours were used for during the 16th century. Understanding the purpose helps verify authenticity. A piece designed for a function that didn't exist in the 16th century is obviously not from that period.
Learn about style periods. The 16th century spans from Renaissance to early Baroque. Style elements changed over the century. A piece with late-Baroque features is probably not from the 1500s.
Document your findings. Create a research file with photos, notes, and source citations. This file becomes your authentication dossier.
Step 5: How to Get an Antique Authenticated by a Specialist
Professional authentication provides credibility that personal research alone cannot match. Specialists have training, experience, and access to comparative materials.
Choose the right expert for your artifact
Different specialists focus on different categories. Furniture experts may not authenticate religious artifacts. Textile specialists don't authenticate metalwork. Research specialists in your object's category.
Look for credentials. Specialists should have formal training in art history, conservation, or their specialty. Professional memberships in organizations like the American Institute for Conservation indicate serious credentials. University affiliations or museum positions suggest expertise.
Ask about experience. How many similar pieces have they authenticated? What's their track record? Can they provide references? A specialist who has examined hundreds of 16th-century pieces brings valuable perspective.
Understand in-person versus written appraisal
In-person appraisals allow specialists to examine the piece directly. They can use magnification, test materials, and assess condition thoroughly. This is the gold standard for authentication.
Written appraisals work from photographs and descriptions. They're less thorough but faster and more affordable. Use written appraisals for preliminary assessment or when travel isn't feasible. Follow up with in-person evaluation if the piece proves significant.
Expect to pay for professional authentication. Reputable specialists charge hourly rates or flat fees. This cost is worth it for valuable pieces. The resulting appraisal document increases resale value and provides insurance documentation.
Step 6: Antique Appraisal and Authentication Methods
Professional authentication uses multiple techniques to verify authenticity and assess condition.
Non-destructive examination techniques
Non-destructive methods examine the piece without causing damage. Magnification reveals construction details, wear patterns, and materials. Ultraviolet light shows repairs and alterations invisible to the naked eye. X-rays can reveal internal construction and hidden repairs.
These techniques are safe for the artifact. They provide detailed information without risk. Most specialists start with non-destructive methods. Only if questions remain do they consider more invasive testing.
When scientific testing is appropriate
Scientific testing analyzes materials to determine age and origin. Wood analysis can date wood within a range. Metal composition testing verifies alloy types. Paint analysis identifies pigments and aging patterns.
These tests are destructive. They require removing small samples. Use them only when necessary to resolve authenticity questions. The cost is significant, but for disputed or valuable pieces, it's justified.
Radiocarbon dating can determine age of organic materials (The Remarkable Metrological History of Radiocarbon Dating (II)). It's expensive and requires sample material. Results provide age ranges, not exact dates.
Red Flags: Forgery and Provenance Concerns
Certain warning signs indicate a piece may be a forgery or significantly altered.
Watch for perfect condition. Genuine 16th-century pieces show wear and patina. Flawless examples are suspicious.
Vague provenance is concerning. Pieces with no ownership history before recent years deserve extra scrutiny.
Mismatched materials are suspicious. A 16th-century piece shouldn't contain mahogany or other materials unavailable then.
Inconsistent style elements suggest reproduction or alteration.
Price too good to be true is often a warning. Authentic 16th-century pieces command premium prices.
Verifying 16th century antique authenticity requires patience and careful observation. Visit our showroom to examine authentic pieces firsthand, or contact us for guidance on authenticating pieces from your own collection.
Frequently Asked Questions
How can you tell whether a 16th-century antique is a reproduction?
Reproductions typically show machine-made marks, uniform wear, or anachronistic materials like modern fasteners or finishes. Genuine 16th-century pieces display hand-tool marks, irregular construction, and wear patterns consistent with centuries of use. Check for maker's marks and examine the wood grain or metal composition. Reproductions often use stains or artificial aging to mimic patina rather than developing authentic surface changes over time. Compare the piece against documented museum examples or auction records to spot inconsistencies in craftsmanship or design.
What evidence can confirm that an antique dates to the 16th century?
Multiple evidence sources strengthen dating: maker's marks or hallmarks specific to the period, period-appropriate construction methods (hand-forged joints, mortise and tenon), wood species used during that era, documented provenance showing ownership history, and stylistic features matching 16th-century design. Patina and wear patterns should be consistent with 400+ years of aging. Museum collections and auction records provide comparison points. However, no single element proves authenticity alone, authentication requires combining visual inspection, material analysis, historical documentation, and expert evaluation to build a compelling case for the piece's age.
How important is provenance when authenticating an antique?
Provenance is critical to authentication. A documented ownership history, especially if it includes museum collections, reputable dealers, or estate records, significantly strengthens a piece's authenticity claim. It establishes continuity and reduces forgery risk. Gaps in provenance do not automatically disqualify a piece, but they require stronger material evidence and expert analysis to compensate. Written documentation, photographs from previous sales, and historical records all support provenance research. Pieces with clear, traceable ownership histories typically command higher confidence in their authenticity and value among collectors.
Can an online expert identify an antique from photographs?
Online experts can make preliminary assessments from photographs, identifying period features, construction methods, and obvious red flags. However, photographs alone cannot confirm authenticity definitively. Material analysis, weight, texture, and subtle wear patterns are difficult to assess without in-person examination. For high-value pieces or when significant financial decisions depend on authentication, an in-person appraisal by a qualified specialist is essential. Online consultations work best as a starting point to narrow down period and style, then guide you toward appropriate next steps, such as scheduling a formal appraisal or contacting a museum curator.