


How to Care for 18th Century Wood Furniture
Table of Contents
- Understanding Your Furniture's Wood Finish
- Essential Tools and Materials for Care
- Step-by-Step Cleaning Process for 18th Century Wood Furniture
- Antique Furniture Humidity Requirements and Environmental Control
- Best Wax for Antique Furniture and Conditioning Techniques
- Identifying Signs of Woodworm in Antique Furniture
- When to Call a Professional Restorer
- Long-Term Preservation Strategies
- Frequently Asked Questions
Last Updated: October 2, 2026
Understanding Your Furniture's Wood Finish
The first step in learning how to care for 18th century wood furniture is identifying what finish protects the wood beneath. Different finishes require different care approaches, and treating shellac the same way you'd treat polyurethane can cause irreversible damage.
Furniture from the 18th century typically features one of three primary finishes: shellac, lacquer, or varnish. Shellac, made from the resin of the lac beetle, was the dominant finish throughout most of the 1700s. It creates a warm, amber tone and develops a natural patina over centuries. Lacquer, which arrived in Europe through Asian trade routes, offers a harder, more durable surface but requires specialized solvents for cleaning. Varnish, a resin-based finish, became more common later in the century and provides excellent water resistance.
Before you begin any cleaning or conditioning routine, perform an inconspicuous spot test on the underside or back of your piece. Apply a small amount of your chosen cleaning solution with a lint-free cloth and observe the finish. If the finish softens, becomes sticky, or shows any sign of damage, you've identified a solvent-sensitive finish, likely shellac, and you'll need to adjust your approach immediately.
Essential Tools and Materials for Care
Caring for 18th century wood furniture requires specific tools designed for gentle cleaning and preservation. Using the wrong materials, even well-intentioned ones, can strip finishes, create water rings, or damage the wood grain irreversibly.
Your toolkit should include lint-free cloths, which prevent fibers from catching on the wood surface or becoming embedded in the finish. Microfiber cloths work exceptionally well because they trap dust without scratching. A soft bristle brush with natural bristles helps remove dust from carved details and ornamental areas without abrading the finish. Stiff brushes or synthetic bristles risk leaving marks on delicate surfaces.
For cleaning solutions, mild soap solution, a few drops of pH-neutral dish soap in distilled water, handles most surface grime. White vinegar diluted 1:1 with distilled water addresses mildew and odor neutralization without harsh chemicals. Never use commercial furniture polish, which builds up wax and can obscure the original finish beneath layers of buildup.
Wood conditioner formulated specifically for antique furniture restores hydration to wood that has dried over centuries. Unlike modern furniture oil, antique wood conditioner absorbs slowly and conditions from within rather than sitting on the surface. A natural wax for antique furniture, beeswax or carnauba wax, provides protection and enhances the wood grain without creating a plastic appearance.
Additional supplies include distilled water for rinsing, a spray bottle for application control, and a soft cloth for buffing. Keep solvent on hand only if you've confirmed your finish can tolerate it, and even then, use it sparingly.
| Tool/Material | Purpose | Best For |
|---|---|---|
| Lint-free cloth | Dust removal | Daily maintenance |
| Microfiber cloth | Fine dust capture | Weekly cleaning |
| Soft bristle brush | Detail cleaning | Carved ornaments |
| Mild soap solution | Surface grime | Light cleaning |
| White vinegar solution | Mildew removal | Odor treatment |
| Wood conditioner | Hydration | Dry wood restoration |
| Natural wax | Protection | Finish enhancement |
Step-by-Step Cleaning Process for 18th Century Wood Furniture
Removing Dust and Surface Grime
Begin every cleaning session by removing loose dust. Use a soft bristle brush to gently sweep carved areas, turnings, and decorative details where dust accumulates. Work in the direction of the wood grain, not against it. Follow with a lint-free cloth, wiping the entire surface with light pressure.
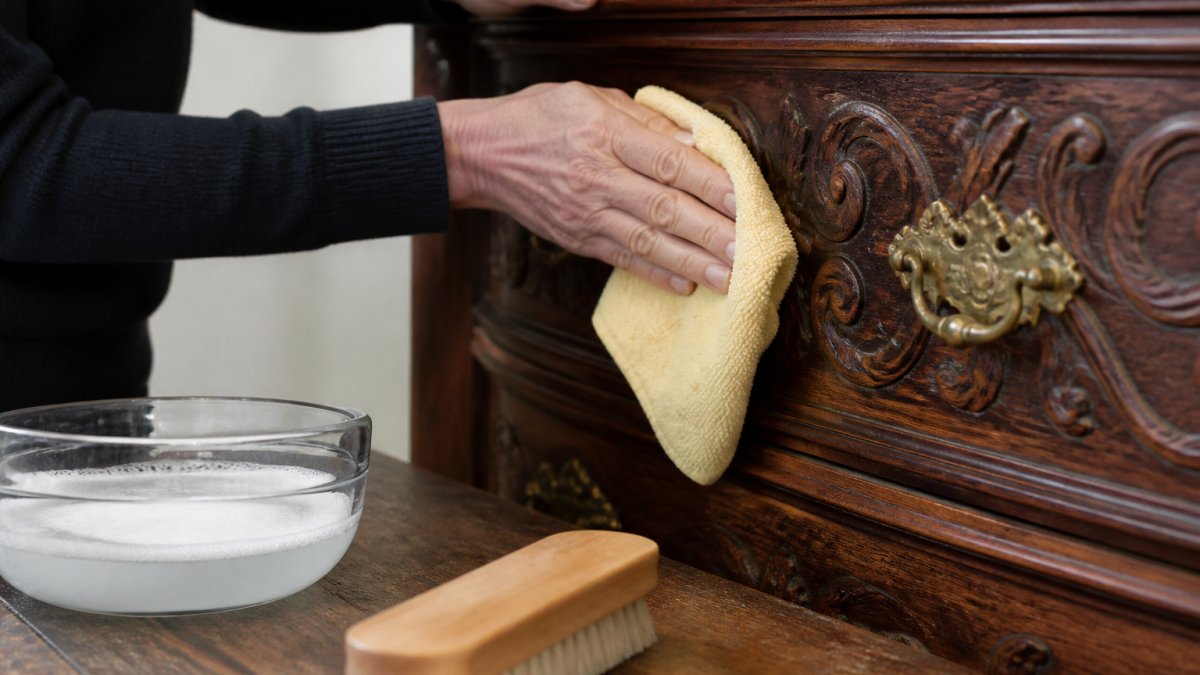
For surface grime, dampen, never saturate, your lint-free cloth with mild soap solution. Wring the cloth thoroughly so it's barely damp. Wipe the furniture in the direction of the grain, working in small sections. Rinse immediately with a cloth dampened in distilled water only, then dry completely with a dry cloth. Any moisture left on the surface can cause water rings or damage the finish.
Common mistakes include using too much water, which penetrates the finish and swells the wood, and scrubbing rather than wiping, which can wear through the protective coating. The goal is surface cleaning only, you're removing dust and light grime, not attempting restoration.
Addressing Mildew and Mold
Mildew appears as dark spots or a musty odor, indicating moisture has compromised the wood's protective layer. This requires immediate attention because mildew spreads and can damage the wood structure beneath the finish.
Mix equal parts white vinegar and distilled water in a spray bottle. Spray lightly onto a cloth, never spray directly onto the furniture, and wipe affected areas. The vinegar addresses mildew removal while odor neutralization occurs naturally as the solution dries. For stubborn mildew, allow the vinegar solution to sit for five minutes before wiping.
After treatment, increase air circulation around the piece and monitor for recurrence. Mildew signals that humidity levels are too high for safe furniture storage.
Treating Water Damage
Water damage appears as white rings, cloudy patches, or dark stains where moisture has penetrated the finish. The approach depends on damage severity and finish type.
For light water rings on shellac or lacquer finishes, a solvent-based approach works: dampen a cloth with appropriate solvent (test first on an inconspicuous area), apply light pressure, and wipe immediately. For varnish finishes, water damage often requires professional restoration because the finish has hardened beyond home repair.
Dark stains indicate water has reached the wood itself. These require professional restoration to prevent rot and structural compromise.
Antique Furniture Humidity Requirements and Environmental Control
The wood in 18th century furniture continues to respond to moisture in the air decades after construction. Humidity fluctuations cause wood to expand and contract, stressing the finish and the joints that hold the piece together.
Maintain indoor humidity between 45-55 percent year-round. This range preserves both the wood and the finish while preventing excessive drying that leads to cracking and warping. During winter months when heating systems dry indoor air, use a humidifier to maintain target levels. During humid seasons, a dehumidifier prevents moisture accumulation that encourages mildew growth.
Position furniture away from direct sunlight, heating vents, and air conditioning outlets. Sunlight fades finishes and dries wood unevenly. Temperature swings near vents accelerate expansion and contraction. Consistent environmental conditions, stable temperature and humidity, preserve the wood grain and prevent finish damage far more effectively than any cleaning product.
Best Wax for Antique Furniture and Conditioning Techniques
Natural wax application enhances the wood grain and provides a protective layer that repels dust and minor spills without building up over time like commercial furniture polish.
Beeswax and carnauba wax are the traditional choices for antique furniture. Beeswax, softer and more pliable, develops a subtle sheen and allows the wood's natural character to show through. Carnauba wax, harder and more durable, provides stronger protection but can create a plastic appearance if applied too heavily. Many restorers blend both for optimal balance.
Apply wax sparingly, a thin coat does more than heavy application. Use a soft cloth to work wax into the wood grain in circular motions, then buff with a clean cloth to remove excess.
Identifying Signs of Woodworm in Antique Furniture
Woodworm, the larvae of wood-boring beetles, can compromise structural integrity if left untreated. Early identification prevents extensive damage.
When to Call a Professional Restorer
Some repairs exceed the scope of home care and risk permanent damage if attempted without expertise. Recognizing these limits protects your investment.
Long-Term Preservation Strategies
Preserving 18th century wood furniture for future generations requires thinking beyond immediate cleaning and conditioning. Long-term strategies protect both the physical piece and its historical value.
Frequently Asked Questions
Should I wax or oil 18th century wood furniture?
The choice depends on your furniture's finish type and condition. For finished wood with shellac, varnish, or lacquer, wax application preserves the patina and provides protection without altering the original surface. Oil works better for unfinished or stripped wood that has lost its protective layer. Always test on an inconspicuous spot first. When selecting the best wax for antique furniture, choose products specifically formulated for antiques rather than modern furniture polish, which can leave buildup and damage historical finishes.
How do you clean antique wood without damaging the finish?
Start by dusting with a soft, lint-free cloth to remove surface grime. For deeper cleaning, mix a mild soap solution with distilled water and dampen your cloth, never soak the wood. Gently wipe the surface following the wood grain, then dry immediately with a clean cloth. Avoid harsh chemicals, vinegar on finished surfaces, and excessive moisture. For stubborn spots, test a small amount of white vinegar on an inconspicuous area first. Never use abrasive scrubbers or modern furniture polish on antique pieces.
What is the best environment for storing 18th century antiques?
Maintain stable temperature and humidity levels between 45-55% relative humidity. Fluctuations cause wood to expand and contract, leading to warping and joint separation. Avoid direct sunlight, which fades wood grain and degrades finishes. Keep furniture away from heating vents, air conditioning units, and exterior walls where temperature and moisture vary. Good air circulation prevents mold growth. Store pieces in a climate-controlled space rather than basements or attics where humidity control is difficult.
How do I know if my antique furniture needs professional restoration?
Signs you need a professional include active woodworm infestations with visible exit holes, structural damage like loose joints that affect stability, water damage causing rot or discoloration, finish loss exposing bare wood extensively, or pest damage requiring chemical treatment. If you're uncertain whether damage is cosmetic or structural, consult a conservator. Professional restorers can identify issues invisible to the untrained eye and preserve antique value better than DIY attempts on significant pieces.